Images/Video
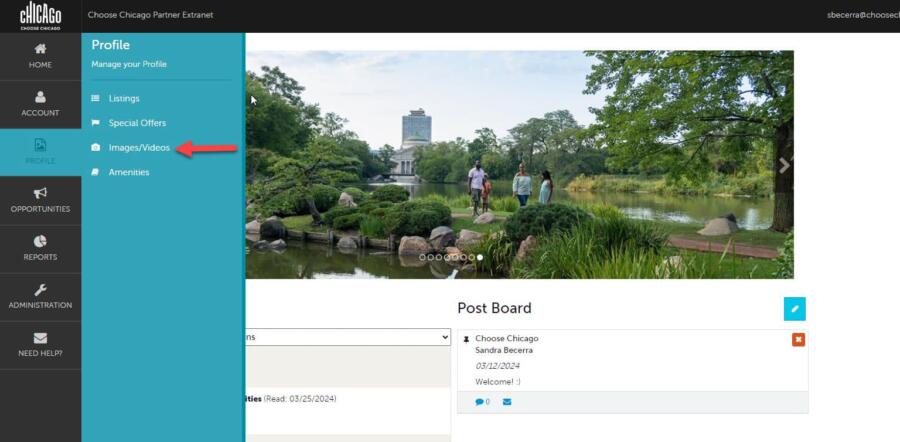
- Log into the Partner Extranet using your username and password. Once logged in, complete these steps to add or update media.
- Select PROFILE on the left-hand menu of the screen.
- Select Images/Videos.
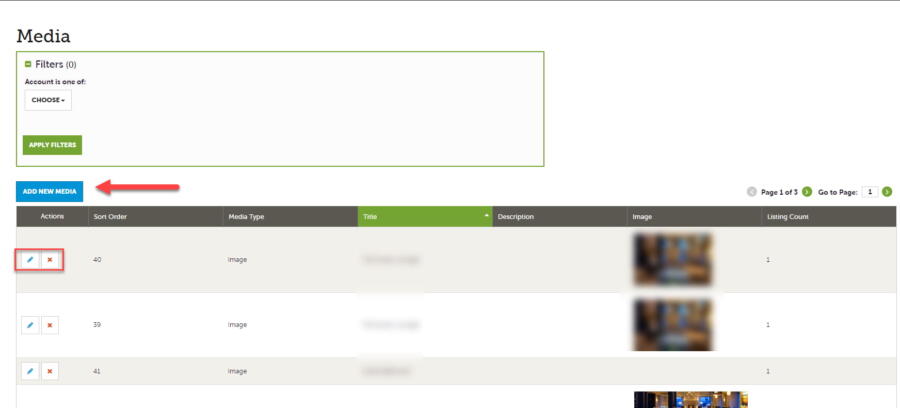
- You will see your company/organization’s existing images saved to your account.
- Click ADD NEW MEDIA button to UPLOAD/ADD a new image or video.
- Click pencil icon to EDIT an existing image or video.
- Click the red X icon to DELETE an existing image or video.

- Click ADD NEW MEDIA and complete the following information:
- Title: Enter a title for your image.
- Type: Select “image” from the drop-down field.
- Sort Order: Enter a # for the sorting of your images (NOTE: Image #1 will appear at the top of your website listing(s)).
- File: Upload an image file* by clicking on “BROWSE” button in file field.
- Listing: Attach the image to one or multiple listings by selecting the listings drop-down field.
- Click SAVE once finished.

- NOTE: JPG Format. Recommended image size: 1800X800. Listings are responsive and will result in cropping along the edges depending on the screen size. Avoid placing text on top of images to avoid unwanted cropping. Do not use logos, they will be cropped.
ADDING A NEW VIDEO
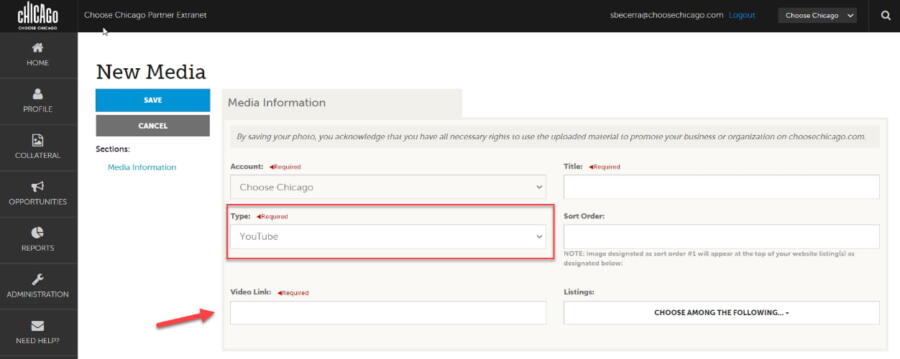
- Click ADD NEW MEDIA and complete the following information:
- Title: Enter a title for your new video.
- Type: Select “YouTube” from the drop-down field.
- Sort Order: Enter a # for the sorting of your images or videos.
- Video Link: Enter the URL to your YouTube video.
- Listing: Attach the image to one or multiple listings by selecting the listings drop-down field.
- Click SAVE once finished.


